 When we last spoke of stoves, we were building the bottom half. This was a timesaver idea we had to help us get 15 stoves done in four days of work. The issue is that the stoves have a concrete “table” that we pour on the ground, to save on the time and expense of formwork. For the concrete to reach its seven-day strength, we have to leave it undisturbed for a week (obviously). During this window, we’d go build the rest of the tanks and take a Sunday off.
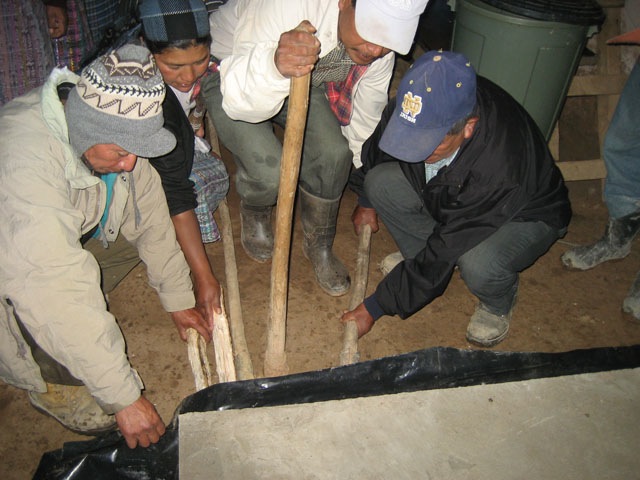
The big downside to this system, besides my secret fear that the tabletops would crack when lifted, is the actual process of lifting them. Like I said before, I estimate the weight of each one to be about 600 pounds. And they’re flat on the floor. I had some ideas how to do this with levers and blocks, but Emily said I should just let them figure it out. Being from a primitive setting with little equipment available, the locals are really good at physical labor, and working out the specifics of how to do it.
I was not disappointed. The day came for me to teach the class on how to do the upper half of the stoves, and my three team leaders showed up… along with twelve strapping men. “Where do you want this thing?” the asked, and I pointed to the base we’d built last week, with a fresh layer of mortar on top. They hummed ad hawed for about two minutes, then picks and poles came out of nowhere, there was some grunting, and they had the entire slab a few inches off the ground, set on some blocks of firewood. A heave-ho and a bit of grunting later, and a 24-legged monster scuttled its way across the room and our table was set.
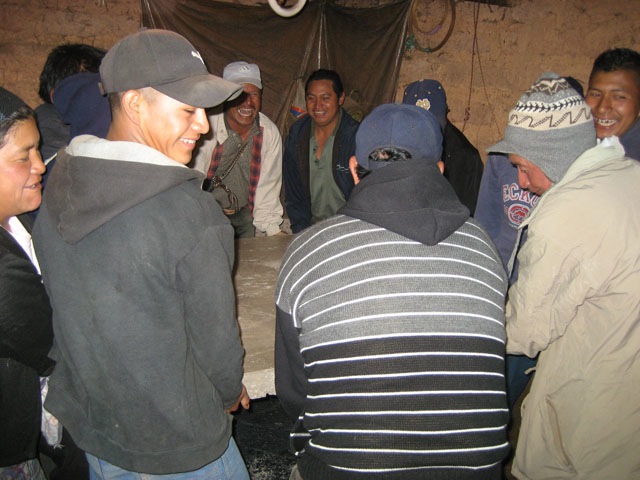
“OK, see ya” they said and they all filed out the door. “We’re off to the next house.” What? Turns out, they are good at organizing, too. Diego and the leaders told the guys to just run ahead to all 13 houses that day, and lift all the slabs. Nice!
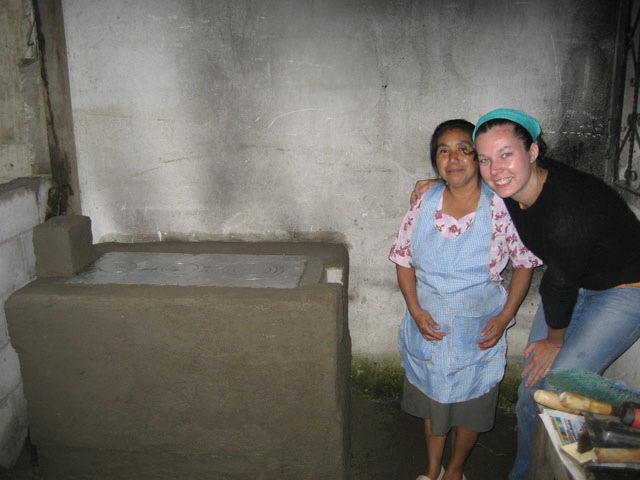
As an interesting side note, our friends Joe and Katy built stoves in their village as well, but didn’t add the table. They looked more like this one we built during training, and took a lot less time and money to build. But we try to make the project suit the culture and climate of each village, and their village is in the blazing-hot jungle climate of the south coast. No one wants to be anywhere near the fire if they can avoid it. In contrast, our village is in the bonechilling highlands, and everyone can be seen gathered around the fire when they’re not working the fields or sleeping. Having a little fireside table is the rage in all the homes here. It’s such a good idea, in fact, that I want to invent some sort of analog for avant-garde homes in US when I get back. 🙂
Now, without any further ado, the rest of the stove building process.
Day 2: The Upper
Like I said, the Brute Squad already went around an hoisted all the 600 pound concrete slabs onto the block bases. That streamlined things quite a bit, and some groups (like Emily’s) were able to do two stove uppers in about 5 hours.
 |
 |
 |
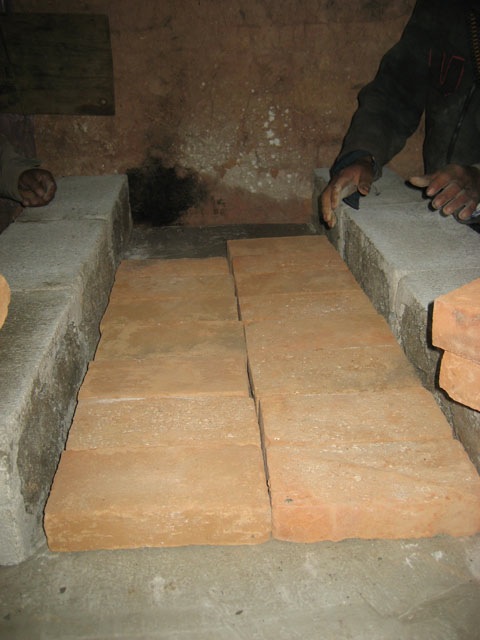
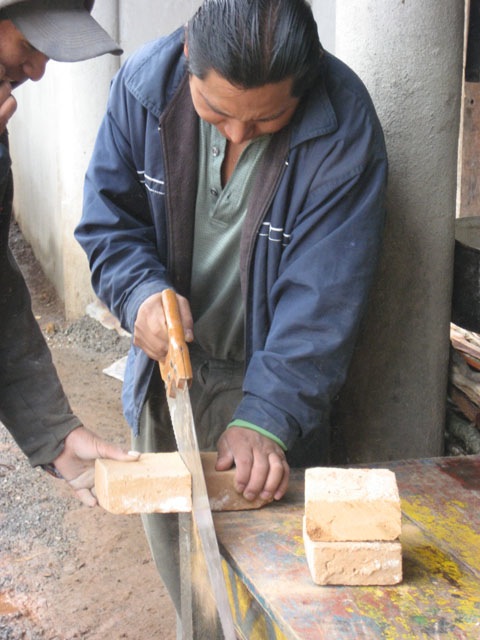
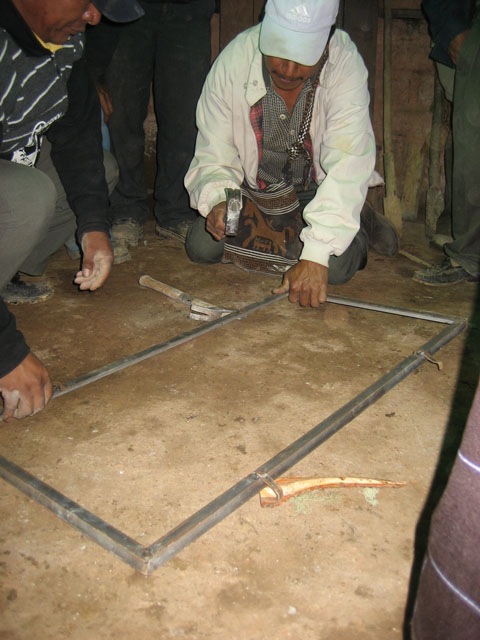
| Lay out the fire brick in the center of the table, but don’t mortar them down. Grab the blocks you filled with concrete last week, and set them along side to make sure everything fits right. | You will have to cut a few bricks. This can be done easily by tapping the brick with the trowel, but around here they like to use a saw. They ruined my hacksaw blade after three bricks, then switched to their own crosscut saws. | Set the blocks in a bed of mortar, then mortar in vertical firebricks to line the side of the firebox. |
 |
 |
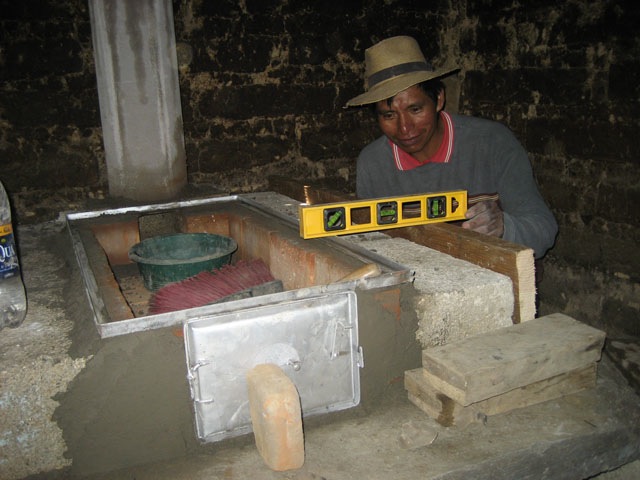 |
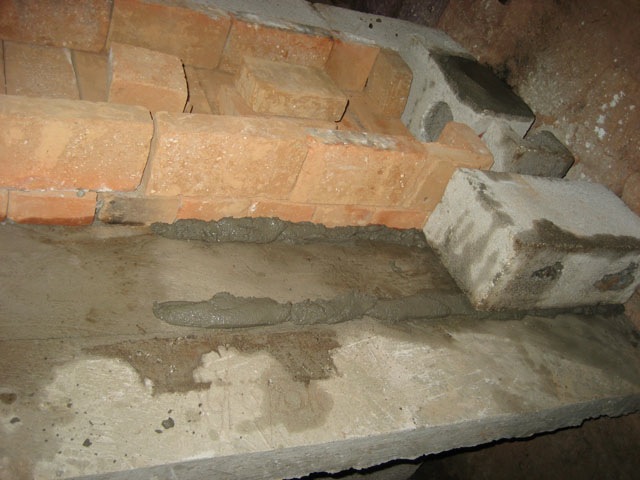
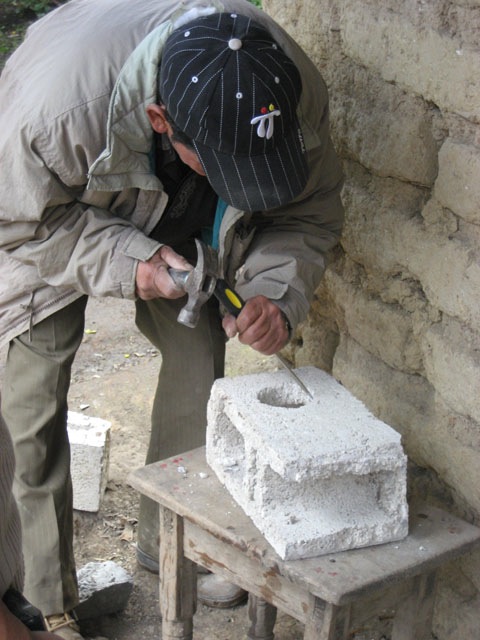
| We need to make an elbow to support the chimney and pass the smoke. Take a block and knock a hole through it with a chisel or piece of rebar. Cement it in place at the back of the stove, with a brick to close the opening at the back. | Using a hammer, straighten the hooks on the plancha and door frames. The tabs help hold the frame in place, but the hooks stick out of the finished plaster. | Lay a thick strip of mortar on top of the firebrick, and set the frame for the plancha. Check for level. Plaster the door in place. |
 |
 |
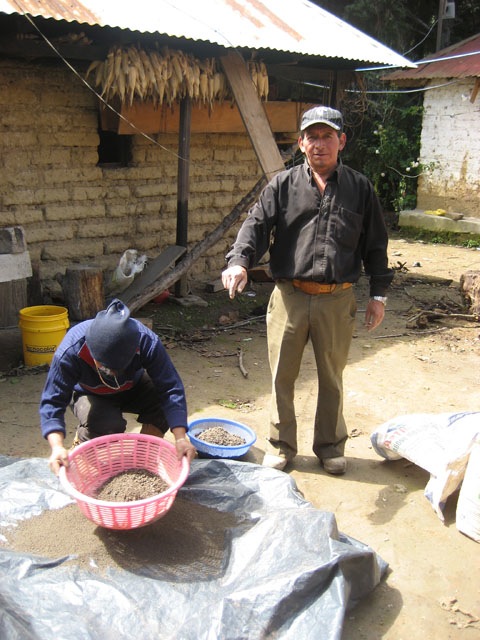 |
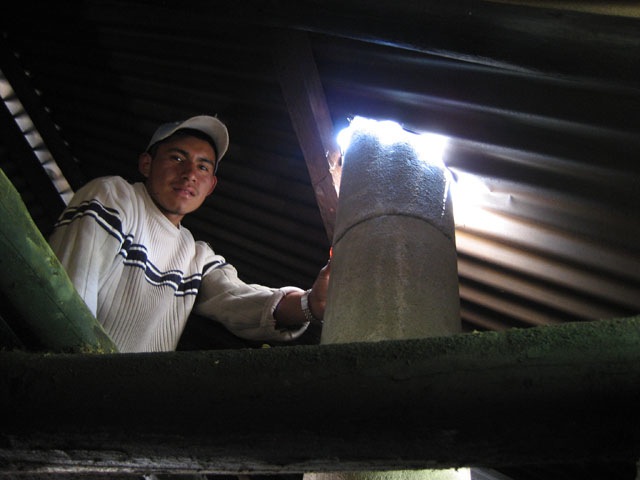
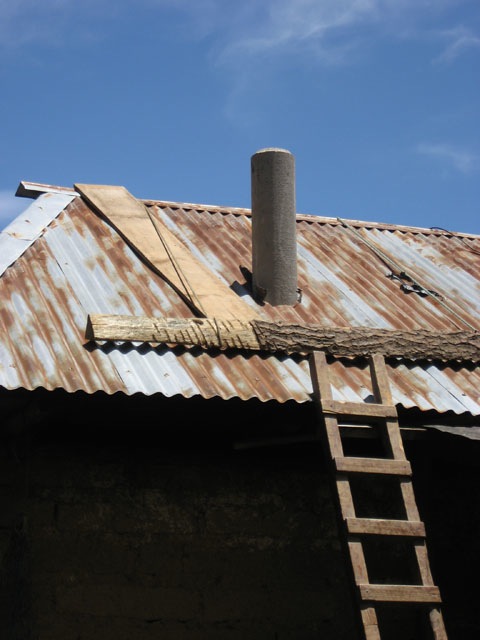
| Set the chimney on the stove with mortar so you can get it plumb. Plumb is important, because it’s really heavy and we don’t want it falling over. Cut the roof as needed to let the chimney pass. | Most of the installations need three chimney sections, but some have low roofs and only need two. Contrary to local belief, the chimney should extend a few feet above the roof, so it can draft properly. Pack the opening with mortar.* | You’re just about done. Plaster the whole thing to make it pretty and easier to clean. At one point we ran out of fine sand for the plaster, so they just got a screen and sifted us some more from the gravel. |
 |
 |
 |
| Sometimes you have to fix messups, too. On Gaspar’s stove, the crew broke three of his four corners off the table because they were too rough when they took off the forms. Yikes! | Perhaps next time Gaspar’s voodoo charms will be more effective at warding off this sort of bad luck. | I was hanging around at the very last house waiting for my assistants to show up, and these kids looked like they needed some toys. So I made them some turwex (dragonflies) out of some scrap wire left over from Day 1. |
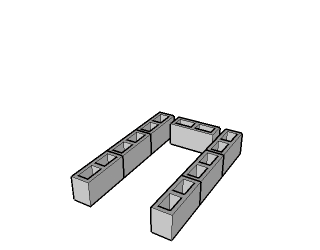
You guys know how much I like SketchUp models. Click here to download a model of the stove I made to help check materials quantities and be sure it all fit together with the things we were ordering.
*Everyone around here uses mortar to seal chimney openings through their tin roofs. It makes me crazy! Concrete is NOT waterproof, and its also very stiff so it can’t move with the tin roof as it expands in the sunlight or moves with the wind. How can that possibly NOT leak? What they need is a proper flashing, but no one here does it that way and there are no pre-made ones available in stores.