June, 2008 Part III: Field Based Training (the construction part)

 After much waiting, we finally got to do some hands-on work. The 16 of us in my program piled into a pair of microbusses and took the rough overland route to central Quiché, where there were three rural schools in need of serious help. We stayed in a hostel for the week, working all day in the rain and passing out at night. There were only cold showers, too, which was awful after a day of dirty construction work.
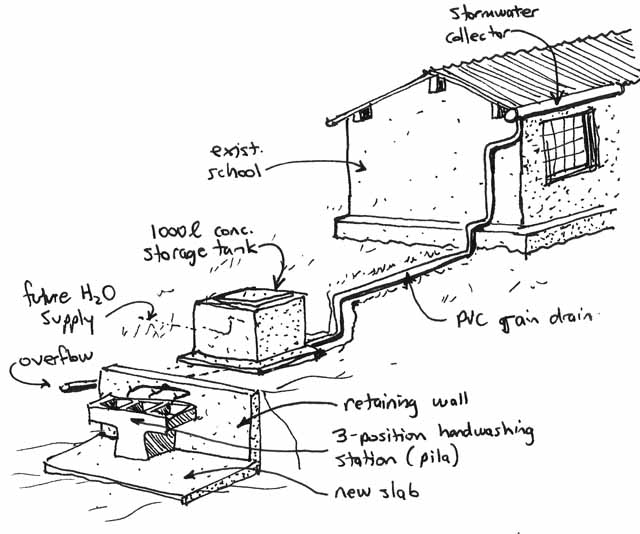
We broke the work into teams; one went to build a masonry latrine, and another built a rainwater catchment system and handwashing basins for a school with no running water (pictured at the right). My team, the largest, built several systems for our school: two independent rainwater catchment systems, a 1000 liter cistern, a handwashing station, a concrete slab at the latrine, and an access ramp. Below is a sketch of the main catchment system:
Most of our team members had no previous construction experience, so I found myself doing a lot of teaching. But I learned stuff as well, like how to accurately bend rebar using grifas (i have no idea what the English word for them is), and how to proportion and handmix concrete with shovels and hoes. We also had one experienced local mason on each team; ours was named Pedro, and he had a lot of practical construction knowledge. But even he made mistakes that were apparent to the knowledgeable eye; for example, he placed the rebar in the water tank much closer to the inside wall of the concrete than the outside- bad for steel protection, as well as inefficiently resisting the tension forces from the hydrostatic pressure. I have to constantly remind myself to dumb it down, to be effective in this environment and not drive myself nuts.
Here is a mostly chronological trip through the evolution of my weeklong project, with commentary as appropriate:
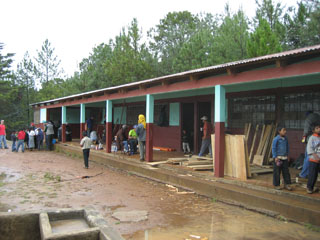 |
Our school. When we were on site, pretty much no class happened, because the students were pretty riled up by all the white people milling about with tools. This turned out to be a big advantage later, as we shall see. |
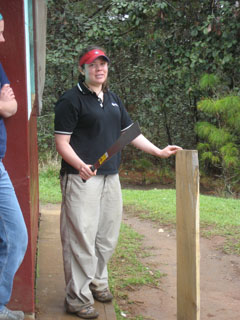 |
All work in Guatemala is done with a very narrow selection of tools. Here, Ellen demonstrates one of several dozen uses for the machete. We did all the rest of the work with only the following tools:
That’s it, folks. No power tools, no cement mixer, nothing. Oh, and i used my Leatherman a lot. That should be standard issue for all Peace Corps volunteers. |
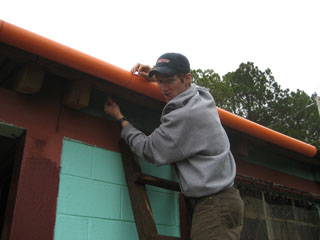 |
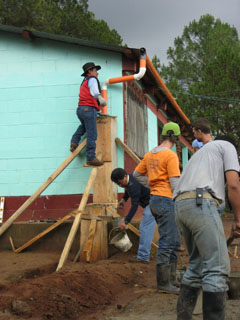
Here is Mateo, installing the rain catchment gutter we fabricated from light-gauge PVC tubing. There is no running water to the school, so the students have to take 10 minutes every day to haul it in from a spring, for cleaning and cooking uses. Now they will have more time for studying (we hope). |
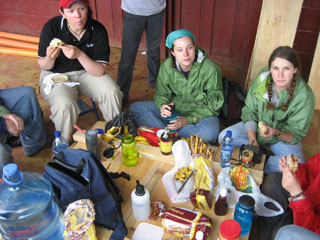 |
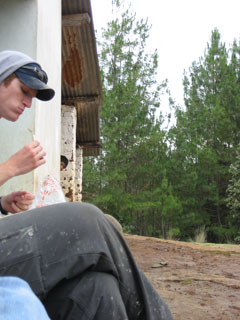
Lunch break looked like this every day. Except we looked dirtier as the week wore on. |
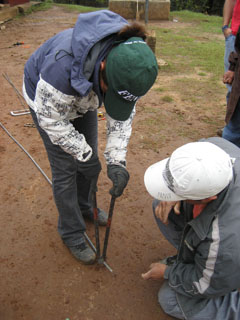 |
Here, Faviola demonstrates proper technique for bending small-radius corners in steel rebar, using a pair of grifas. Pedro, our local expert, looks on and critiques. |
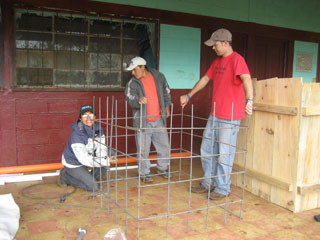 |
This is the rebar cage for the concrete water storage cistern. The wooden box to the right is the form for the outside of the tank. Interestingly, they didn’t really care if there were sizable gaps in between the boards. Gaps up to 2 inches are just stuffed with newspaper to keep the concrete from leaking out. Heh. I think that if i saw a contractor do that in the US, I’d have to reject the work. Or at least, make fun of him. |
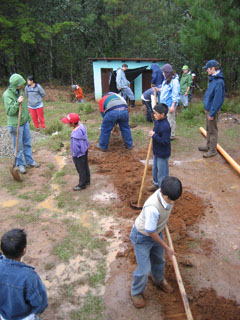 |
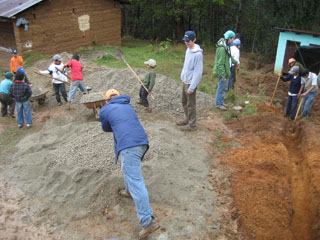
We had to lay a 3″ underground rainwater pipe (pvc) to move the water from the roof collector to the cistern. We started digging the trench, then streams of schoolchildren came out of the school and grabbed the picks, hoes, and shovels and got to it. We were pretty blown away; not only are American schoolchildren kindof lazy when it comes to physical labor, but more importantly, i can’t imagine any of them knowing how to use a shovel or pickaxe. But these kids farm the old fashioned way half a day every day, and know very well how to dig like moles. |
 |
I had to get this picture of Fernando, the 14-year-old kid on the right. He saw me digging, shook his head disapprovingly, and asked me for my hoe. I handed it to him, and the mud started flying. I had to jump out of the way to avoid being buried by the mound of flying dirt; in about 20 minutes he took my tiny hole and turned it into a trench a foot wide, two or three feet deep, and about 30 feet long. Check out the next picture: |
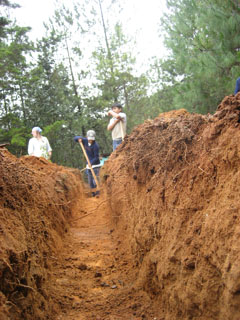 |
Fernando’s trench. Yikes. He is a digging MACHINE. |
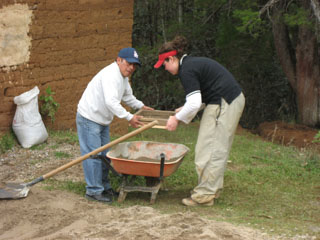 |
If you need sand of a certain size, you have to sift it by hand. Very labor intensive. The guy on the left helping Ellen is not one of the students; its Oscar, one of our language teachers. He’s probably the shortest adult I’ve ever met. |
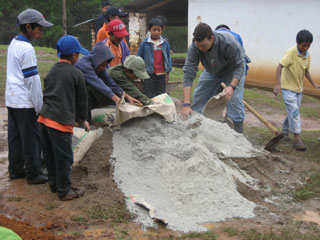 |
A lot of kids got excited about helping us mix the concrete. Here, we open a bag of cement. Being upwind is a good idea, as no one has masks and the powdered cement goes everywhere. |
 |
Mixing concrete with a shovel, on the ground. It’s a heap of work. The first step involves mixing the cement with the sand, by moving the pile back and forth three times, shovel by shovel. |
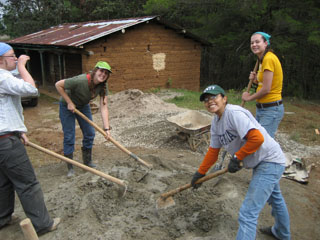 |
Next, gravel and water are added, then you mix it some more until it’s ready to go. |
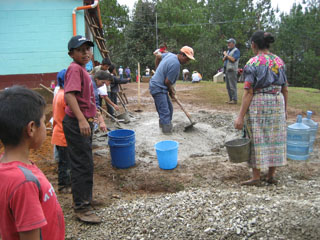 |
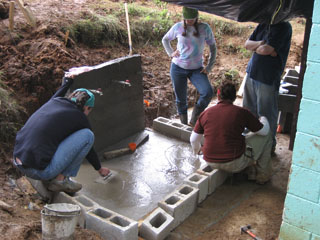
Concrete is moved to the pour by bucket brigade. The schoolkids really liked that part. Check out the lady in the traditional dress; she is a community member that turned up to help out with the work. That happens from time to time (which is the whole idea) but it’s unusual that the women get involved, due to the strong gender roles of the culture. |
 |
This is the inside formwork and rebar cage for the 1000 liter water storage cistern. |
 |
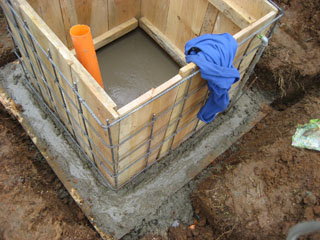
Outer formwork in place, ready for the pour. |
 |
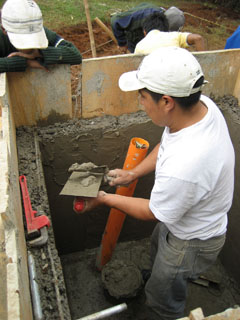
During the pour, I noticed that no one was consolidating the concrete. So, i grabbed a spare a 5′ piece of rebar and started running it up and down (as well as whacking the forms with a hammer), consolidating the concrete, since there are no vibrators here on site (or ANY power tools, for that matter). Pedro seemed to think this was a good idea, but about two-thirds into into the pour, he told me to stop because he was worried about the forms blowing out. This sounded dumb to me, but he’s the expert, so i stopped. The result is clearly visible in the voids a third the way down from the top. |
 |
I thought voids in a WATER STORAGE TANK seemed like a “fail”, but Pedro was unconcerned. Around here, standard practice is to go back and “plaster” the entire thing with yet more concrete, this batch without gravel. |
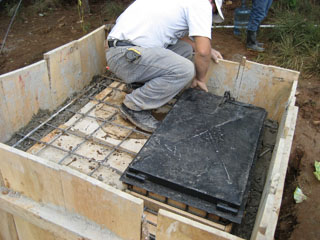 |
Once we got the inside sorted out, we added formwork for the lid of the tank, and the reinforcing cage was wired in place along with a prewelded hatch. |
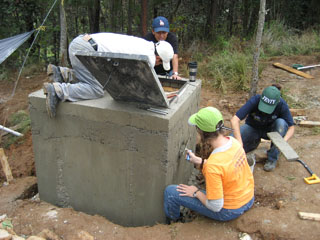 |
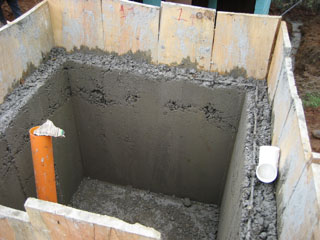
This is two days later, when the tank was mostly cured. Pedro used a hammer to break the wood form for the top, then climbed into the tank to remove the pieces. Ann and Favi plastered the outside of the cistern to make it presentable. |
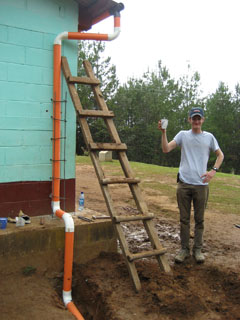 |
Here is Mateo, showing off the sexy bit of plumbing he and I whipped up. In his hand, he’s toasting the good work with a hot glass of Mosh that the teachers passed out during a coffee break. It’s kindof like oatmeal, without the oats. Mmm-mm good. |
 |
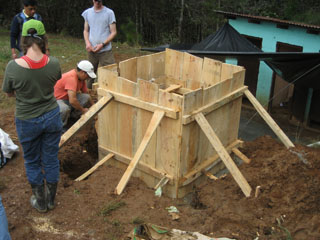
Later on, we poured a protective concrete pilaster around it to keep the kids from breaking it after we left. |
 |
Some kids were really shy, but couldn’t help their intense curiosity. This one was sneaking a peek at us during our lunch break (in the background, beyond Mateo). |
 |
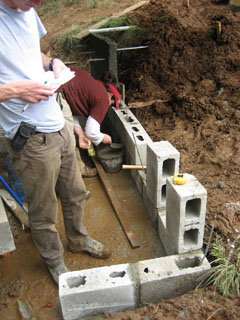
Here’s the plumbing downstream of the cistern. Mateo and I assembled a 3-branch faucet from galvanized threaded pipe, and the concrete team poured a wall around it. The slab below will support a 3-station washbasin. The basin weighed about 600 pounds (precast concrete for durability) and we had to move it without equipment. That was a pretty horrible experience. |
 |
This is a little masonry retaining wall to hold back the hillside above the latrines, next to the washbasin. |
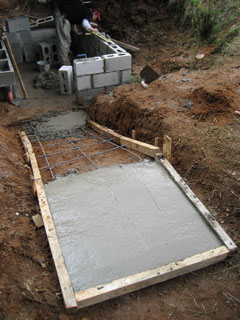 |
Retaining wall is about half up. While they were doing that, i was laying out the new concrete ramp to get to the latrines & washbasin. No, it is not ADA accessible. Not even close. But it’s a heck of a lot better than what they had. |
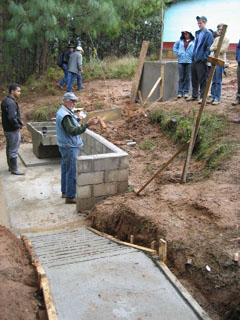 |
Ramp and retaining wall done, texture added to the ramp to keep it form being a slide during the rainy season. The fellow addressing the crowd is Lyn Roberts, an aid worker that trains peace corps volunteers about construction methods and region-specific technical practices. Also, notice the precast concrete washbasin (called a pila) in place . |
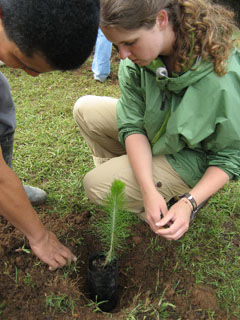 |
Before we left, we also planted a dozen or so pine saplings to help with erosion control and visual screening. |
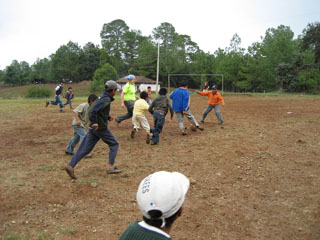 |
Occasionally, we had to break to play some soccer with the kids. We usually got trounced pretty bad, although the Guatemalan construction workers played on OUR team, and that kept it a little more balanced. |
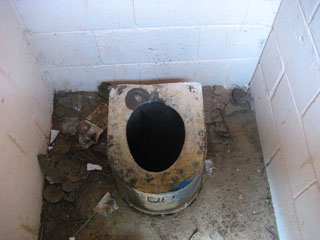 |
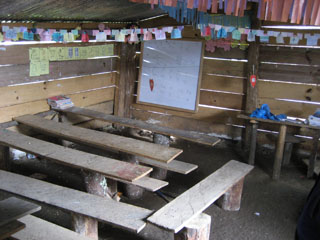
This is the latrine at our school. It is quite dire, and smelled worse than it looks. Several of the girls in our team waited until the kids went home for the afternoon and then peed in the woods. |
So, that is my amazing construction story for Field Based Training. They don’t have any more construction lined up for us for the rest of the year. But things are looking up… Emily Alta’s family in San Louis heard that we build efficient woodburning masonry stoves, and they’re gung-ho about the 4 of us building one for them. They need to buy the materials, as none of us have any funding yet, but we told them we’d do the work. That might be on for next week; i’ll keep you posted. The game now is all about drumming up these “secondary projects”.
Be careful out there.
-jim